How to Turn Patient Imaging Data Into Functional 3D Models
Patient imaging data is a powerful and robust source for developing anatomically accurate and functional 3D models. Having an accurate representation of anatomy available to engineers and designers during product brainstorming and design is an invaluable resource for therapy devices. This blog outlines the process of creating 3D models, and innovative methods to use them throughout medical device development.
The imaging modalities which hold the required data for the creating 3D models are Computed Tomography (CT) and Magnetic Resonance Imaging (MRI). Both generate DICOM data sets. This data set is termed a “Volume” as its data has 3 dimensions, and is comprised of voxels, which are similar to pixels in that they hold colour and opacity, but also have volumetric qualities relating to width, depth and height. Just as pixels come together to generate a 2D image, voxels come together to generate a 3D volume.
Using this data, software can be used to select voxels within a dataset pertaining to an anatomy of interest to generate a 3D volume, and subsequently, a model. Programs exist such as 3DSlicer and InVesalius (both free) which allow the user to create a “Segmentation”. Segmenting is the process of creating an identified subset of voxels using a governing characteristic that is shared between them. One method to accomplish this task is “threshold segmentation” which segments all voxels within an identified voxel intensity. Different body tissues and materials will have different voxel intensity thresholds that capture them. This makes it possible to set a voxel intensity to capture bone, air, and soft tissue independently.
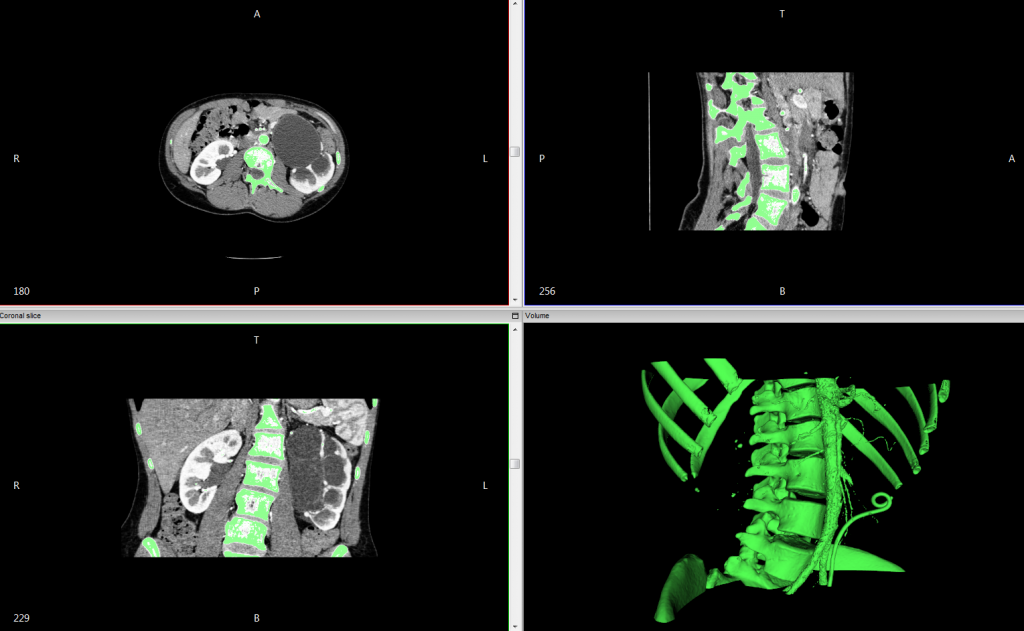
The images above (sample DICOM data) show an example of thresholding the DICOM data to a range that captures bone and varying vasculature from a chest CT, with the resulting generated 3D surface. The program computes these segmentations by interpolating image differences between the slices of the data set. For a higher resolution segmentation, it is best to work with a higher resolution CT, of ideally around 1mm or less.
The InVesalius software used for the above segmentations creates a 3D surface rendering from the segmented voxels, painting over the voxels that capture the specified intensity range (the green highlights within the CT set).
The next step in the process is to export the 3D rendering in an appropriate file type like STL (an abbreviation of “stereolithography“). The STL file is common and appropriate for generating a functional model.
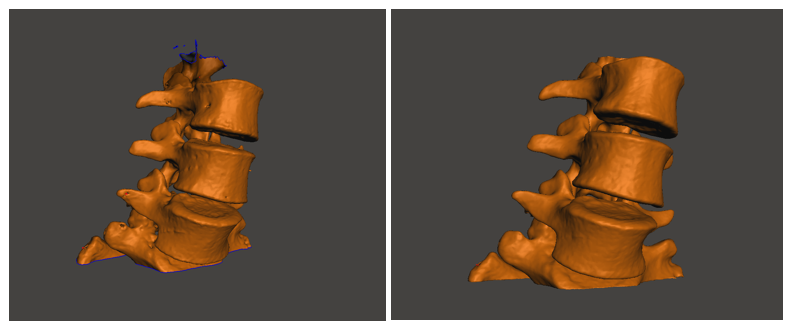
Because of the method used to segment the model, revisions may be required to isolate the anatomy of interest from the generated model. Model manipulation could include cutting, simplifying and smoothing the model to obtain the required end form. Meshmixer is a user-friendly platform that I used to accomplish these tasks.
For the purpose of a demonstration, I brought the previous surface into Meshmixer as an STL, and used the tools available to heal any surface imperfections that resulted from my original threshold segmentation. I removed additional artifacts from the model to keep the vertebrae, as an example of anatomy I was interested in isolating.

For functional modelling, it is important that the model be free of any imperfections or inconsistencies. The screen shots above show the results of manual surface healing. I used Meshmixer’s robust ‘selection’ tool to remove the surface discontinuities and the ‘inspector’ tool to find the hole I created and replace it with a continuous surface. Depending on the application, it is of increasing importance to ensure that the tools used during this stage do not alter the overall shape, or size of the model, and that the original anatomy is preserved.
At this stage, an STL file has been created, cleaned of any imperfections, and manipulated to suit the purpose of the model generation. What is done to the model at this point is dependent on the intended use. To illustrate rapid prototyping capability, I joined the surfaces of the vertebrates to make one homogenous model and loaded it into Ultimaker Cura to simulate a 3D print. I chose a vertebrae as my demonstration model, but the process works for bones, hands, feet, ears, noses, lungs, hearts, etc. The opportunities are endless.
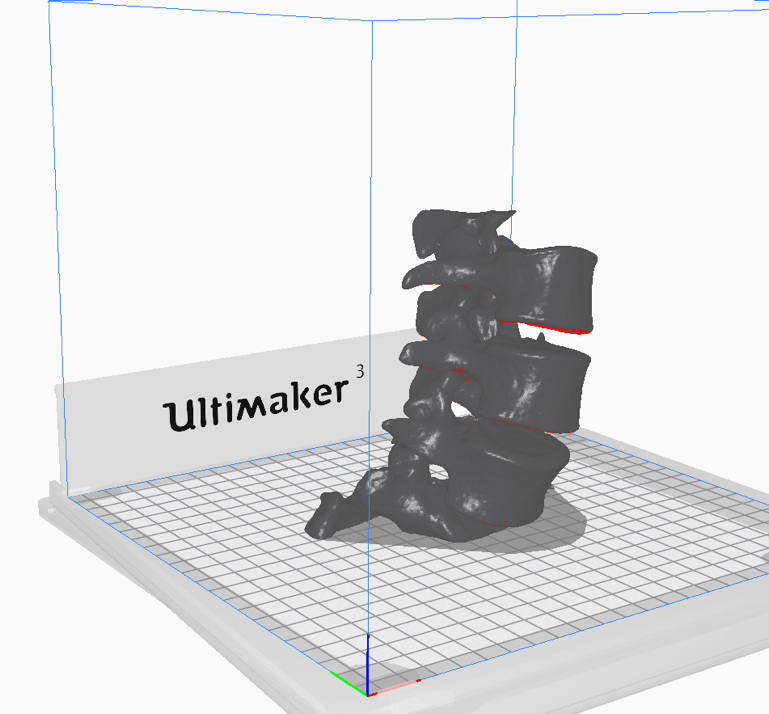
3D models such as these can provide immense value with respect to therapy device anthropometric design considerations and benchtop testing. The process to create them is flexible and well documented, allowing you to tailor the end product to your personal needs.
Hannah Rusak-Gillrie is a Human Factors Engineer. She is a co-author of Simulation-Based Mock-Up Evaluation of a Universal Operating Room, in the online edition of HERD: Health Environments Research & Design Journal.
Images and Illustrations: StarFish Medical
Join over 6000 medical device professionals who receive our engineering, regulatory and commercialization insights and tips every month.
