Tips to Help Prototype a Medical Device on a Budget
There are so many methods available to prototype that I’d like to expand upon an earlier blog. In this article I share the low-cost tips and methods on how to prototype a medical device on a budget that I use in my New Product Introduction (NPI) work for Startups & Founders. Just as importantly, I explain when I use these methods. Not everything needs to be a painted, fully functional prototype.

Cardboard
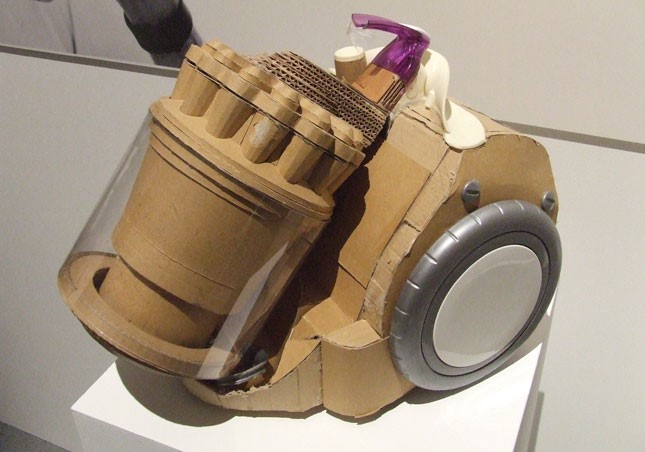
You may laugh, but good, old fashioned cardboard models are very effective in visualizing the look and size with a general, have-it-in-my-hands, prototype.

TIP: Create creases and rounded shapes by scoring one side of the cardboard. Glue the shape in place with a bit of hot glue at the bend.
Wood
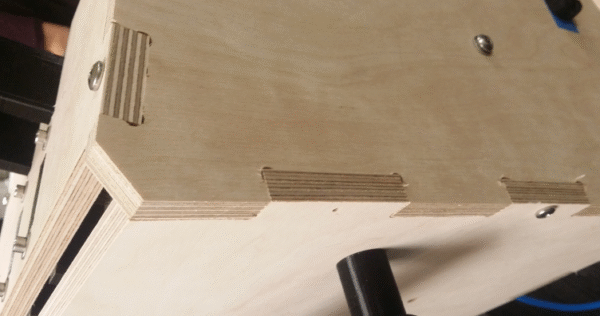
Wood can yield fast prototypes. Use wood prototypes for quick usability tests. Add components (like 3-D printed parts), or adjust and re-position components quickly with wood. Router Plywood quickly and inexpensively using local vendors.

Another advantage of wood is the ability for you to add weight to the prototype medical device, including casters and other components, to simulate the final device. Conduct early formative testing with wooden models. Set the stage for formal formative and summative testing later.
When we need a prototype to move around, or we aren’t quite sure of where to position components on a device, I use wood to great success on carts, or similar devices.
TIP: Achieve sharp corners by relieving the corners with half of the router bit. Pre-drilled holes make assembly fast and consistent.
Plastics
There are numerous blogs on 3-D Printing here and here. 3-D printing’s value is clear and it can be used in any stage of development. My colleague, Nathan Muller, discusses the FDA’s 3-D Printing guidelines here.
Of course, machining plastics is very common. Five-axis machining creates very complex, almost injection-moulded quality shapes. Other alternatives exist when machining doesn’t make sense. It’s important to note that most 3-D printed plastics (or even machined plastics) may differ in impact, strength, or other mechanical properties from injection moulded plastics. The latter can have internal stresses and other defects, but the selection of plastics for machining and 3D printing is much more limited.
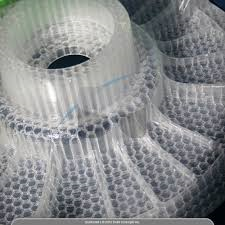
Vacuum forming mould costs can be inexpensive. The moulds can even be 3-D printed, given the right choice of materials. Vacuum forming packaging is a great way to get the look and feel of a finished product without the high cost of tooling.
Metal Prototyping
Beyond using sheet metal and machining, it can be difficult to get a net-shape, metal part that looks like a metal part, feels like a metal part, and can be tested just like the real thing.
Fortunately, there are a few methods. The first is a 3-D printing method called SLS (selective laser sintering). Here, a laser fuses powder into a net shape part layer by layer. Parts made this way have a porous surface, which is rougher, and not fully dense. Strength and friction will vary from parts that have been cast.
SLM (selective laser melting) is similar, but the powder is actually melted completely, so you don’t have the porosity that you do with SLS. Unlike SLS, SLM is only feasible using one powder type at a time. With SLM, you still have a rougher outer surface. Some finishing may be required to reduce friction if that is a concern.
Both of these processes can be ISO-10993 compatible, and even USP Class VI (121°C).Another approach is to use investment casting, also called lost wax. It’s a very old process, but still has advantages today. A wide variety of materials are available, with complex undercuts that few other processes are able to achieve. In investment casting, a mould creates a wax model of the part.
The part (or multiple parts) is attached to the sprue, which often looks like a tree when the parts are attached. The wax sprue is then dipped in ceramics and silicates, and then the wax is melted leaving the cavities intact. Then molten metal is poured in the cavities. With the advent of 3-D printing, an SLA part (sometimes called “Quickcast”) can be used to replace the wax part on the sprue. The SLA is honeycombed, and then burned out when the molten metal is poured into the ceramic mould.

Investment casting has a rough surface due to the sandblasting and breaking of the ceramic mould, but the parts can be buffed or electropolished to create mirror finishes if necessary.
Handling and processing of these methods are more expensive, but if the only way to verify your design is to have a metal part, the processes are a lot cheaper than a tooled part. Five-axis machining can create amazing shapes, but sometimes the result is still not sufficient.
Final Word
The designer’s tool box to prototype a medical device on a budget is becoming more extensive and more adaptable. Simple methods have surprising value if used at the right moment. While 3-D printing is fantastic, large parts can be expensive. Simple methods like cardboard or wood modelling can often deliver what you need without breaking the bank.
Dana Trousil is a StarFish Medical Mechanical Engineer and NPI Team Lead. He has successfully launched many products, with experience in a variety of processes, including NPI for medical device Startups & Founders.
Images: StarFish Medical
